
How to install a flush-to-wall pocket sliding door
Sono due montaggi distinti, separati da settimane di cantiere: il controtelaio entra a parete grezza, l’anta si monta a intonaco finito.
Chi arriva da una porta a battente si aspetta un’unica posa. Qui invece la prima metà del lavoro la fa il muratore e la seconda il montatore, e in mezzo passa tutta la costruzione della parete. Sotto ci sono le due sequenze nell’ordine in cui vanno eseguite, trascritte dai fogli che diamo ai nostri installatori: six operations for the pocket frame, tredici per l’anta.
Watch the installation before you read it
Il video mostra il montaggio dall’inizio alla fine in meno di due minuti. Sotto trovi la stessa cosa scritta passo per passo, con le quote del pannello e del foro.
Two things people almost always get wrong
The first is about the product: this guide applies to the door that disappears inside the wall, not to the one that slides in front of the wall. The second is a part that has to be thrown away, and hardly anyone knows it.
Which of the two doors do you have

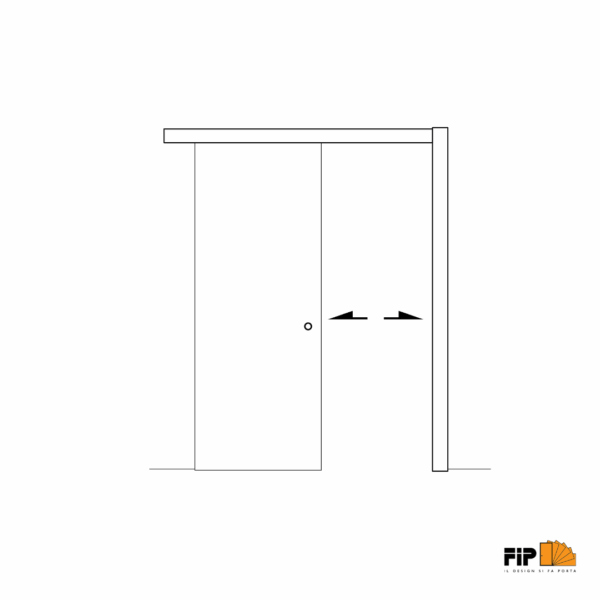
La scorrevole esterno muro con binario Magical ha un montaggio suo, e non c’entra niente con questo: non ha controtelaio, non ha intonaco, si fissa a parete finita. Se è la tua, il foglio giusto è in download area.
The wooden jamb stop in the pocket frame goes in the bin
Inside the pocket frame, whatever the brand, there is a jamb stop made of raw wood. That is not the one to fit. The FIP sheet is explicit, and writes it in capitals:
“Jamb stop to be used for the panel. Dispose of the raw wood one supplied in the pocket frame.”
The correct jamb stop is the aluminum profile you will find in the FIP kit, labelled C. Montare quella di serie significa avere un bordo in vista dove invece deve esserci il filo dell’intonaco: l’effetto rasomuro salta, e ci si accorge quando la parete è già finita.
The pocket frame, six operations
You will need a trowel, pincers, a drill driver, a plumb line, a square, a tape measure and gloves. The four components are labelled on the sheet: A the pocket frame with the mesh, B the upright, C the jamb stop, D the two spacers.
Identify the four parts
A, B, C and D, plus the supplied kit: the door accessories, the carriage kit and the two wall anchors. Before drilling, check that everything is there.
Fit jamb stop C onto the pocket frame
Fai entrare il profilo in sede scorrendo dall’alto e fermalo con two Ø 4 × 19 screws. This is the part that replaces the wooden jamb stop.
Fit upright B
Place it against the pocket frame on the opening side and fix it with six Ø 3.9 × 13 screws. This upright will later hold the brush strip and the gasket.
Insert the two spacers D
Uno in alto e uno in basso, a contrasto fra montante e controtelaio. Servono a tenere la geometria mentre muri: senza, il controtelaio si chiude e l’anta non passa più.
Plumb and square
Plumb line on the upright, two 90° angles sulla traversa superiore. Fai questa verifica adesso: dopo l’intonaco non si corregge più niente.
Install it
From here the sequence splits: in masonry you set it with the wall anchors, in drywall you screw it to the structure. The two variants are below.
Masonry variant
The pocket frame is fixed with the wall anchors, bent and embedded in the mortar. Then you plaster up to the line set by the frame, without going past it: it is the frame that dictates the finished surface, not the other way round.
Filling around the perimeter is done in three stages: filler in the corners, skim coat, finished surface.
Drywall variant
The pocket frame is screwed to the metal structure and the boards close up against its edge, not over it. The edge of the frame is the thickness reference for the board and for the skim coat.
The two wall thicknesses indicated on the sheet are 10.5 and 12.5 cm.
The opening to leave
It is identical in both variants. LT is the outside width of the pocket frame, HT its height.
| Opening dimension | Value |
|---|---|
| Width | LT + ~10 mm |
| Height | HT + ~10 mm |
L’ultima riga del foglio, e non è un dettaglio. «Rimuovere i distanziali solo dopo la perfetta seccatura del cemento.» Toglierli prima, per vedere se l’anta scorre, è il modo più comune di ritrovarsi un controtelaio fuori squadra a intonaco fatto. I distanziali poi si buttano: hanno finito il loro lavoro.
L’anta e il binario, tredici operazioni
This half is done once the wall has been skimmed and painted. You will need gloves, a tape measure, a drill driver, scissors, a hammer, a hacksaw, a router and a size 4 Allen key. The first three dimensions are the ones that decide whether the panel fits or not: L is the width of the clear opening, H its height.
Sliding direction
Right or left: it is the same door, only the side it slides into changes. The first two boxes on the sheet show the two cases.
Preparing the opening
Controlla che l’intonaco sia a filo del montante e che la cava sia libera. Se l’intonaco ha sbordato dentro il controtelaio, rifilalo adesso.
Floor guide plate
Place it in its seat on the floor, aligned with the center line of the opening.
Fixing the plate
Due viti, a filo. È il pezzo che impedisce all’anta di oscillare in profondità mentre scorre.
Brush strip and gasket
Cut them to size with the scissors and insert them into the groove in the upright. Measure on site first, then cut: the groove does not forgive a piece that is too short.
Panel dimensions
L + 25 mm in width and H − 8 mm in height, where L and H are the width and height of the clear opening; thickness 42 mm maximum. Sulla testa dell’anta corre una cava da 15 mm deep and 7 mm wide.
Machining the top edge
Rout the rail seat 200 mm from each end, measuring 20 × 20 mm with a tolerance of +0,2 / 0. Between the rail and the edge there is about 3 mm.
Carriages on the blocks
Two four-wheel carriages, labelled A1 and A2. Non sono uguali: A2 porta l’aggancio del finecorsa, A1 no. Il foglio segna entrambi con il triangolo di attenzione.
Position of carriage A1
At about 32 mm dall’estremità, sul lato che entra per primo nella parete.
Position of carriage A2
This one too at about 32 mm, on the opposite side. Swapping A1 and A2 means fitting the end stop on the wrong side and opening everything up again.
Fitting the rail
The rail goes in at an angle, turns into its seat and then slides into position. Tighten it with the size 4 Allen key.
End cap
Chiude il profilo sul lato d’ingresso e nasconde la testa del binario.
Finecorsa dell’anta
Set the stop at about 45 mm: this is the measurement that decides where the door stops and how much of it is left out to grip.
Un’incoerenza che vale la pena conoscere. The pocket door sheet specifies a panel thickness of 42 mm maximum. L’anta del rasomuro a battente Art. 220 è da 44 or 54 mm: they are two different leaves, and they are not interchangeable. If you are ordering with the idea of using the same door for both a hinged opening and a pocket opening, ask for confirmation first.
Which pocket frames it fits
The door is designed to be fitted to an existing pocket frame, even one from another manufacturer. These are the brands listed on the data sheet.
Compatible pocket frames
Essential (Scatole), Dierre, Ermetika, Myth, Protek.
È il motivo per cui il montaggio si può affrontare anche in fai da te su una parete già costruita: se il controtelaio c’è, si lavora solo sull’anta e sulla battuta.
If the pocket frame has been in the wall for years
There is a conversion kit that removes the jambs and trims from a traditional sliding door already installed: extruded PVC frame with fiberglass mesh, brush holders, noise-reducing gaskets and adaptable brush strips, all paintable.
The installation sheet states the limit: compatible with pocket doors up to 100 × 210 cm, on walls from 10.5 to 11 cm thick.

What people ask us on the phone
Can I install the pocket sliding door myself?
La seconda fase sì, se il controtelaio è già murato e in squadra: sono operazioni da avvitatore, brugola e forbici. La prima fase no, o meglio: può farla solo chi sta già costruendo la parete, perché il controtelaio va messo a piombo e murato prima dell’intonaco.
What size should the panel be?
Width L + 25 mm relative to the clear opening, height H − 8 mm, thickness no more than 42 mm. The top edge needs a groove 15 mm deep and 7 mm wide to hold the rail.
How big an opening should I leave in the wall?
About 10 mm more than the outside width of the pocket frame and 10 mm in più dell’altezza. This applies to both masonry and drywall.
When can I remove the spacers?
Solo a cemento perfettamente asciutto. È scritto in quattro lingue sull’ultima tavola del foglio, e non è una precauzione formale: sono loro a tenere il controtelaio in squadra mentre la malta lavora.
Should I use the jamb stop I found inside the pocket frame?
No. The raw wood one that comes inside the pocket frame must be disposed of: you fit the aluminum jamb stop from the FIP kit.
Is the same leaf suitable for a hinged opening?
No. Il rasomuro a battente Art. 220 ha un’anta da 44 o 54 mm, la scomparsa arriva a 42. Sono prodotti diversi anche quando la finitura è la stessa.
The other guides in the line
The hinged door has its own sequence, different from this one at every step. The fine adjustments, on the other hand, are always made once the wall is finished.
Ask us for the right diagram
Controtelaio di un’altra marca o già intonacato, spessore di parete fuori standard: sono situazioni che hanno uno schema loro. Scrivici com’è fatta la parete e a che punto è il cantiere, e ti mandiamo lo schema giusto prima che qualcuno stenda l’intonaco.